Routing rules on Microsoft 365 for email branding
To setup routing on Microsoft 365 for email branding, you need to setup a connector and a rule in the Exchange Admin Centre and then apply it. This document takes you through the steps to do this on the management platform, first adding the connector and then the rule.
ADDING THE CONNECTOR
Log in to the Exchange admin center, navigate to mail flow.
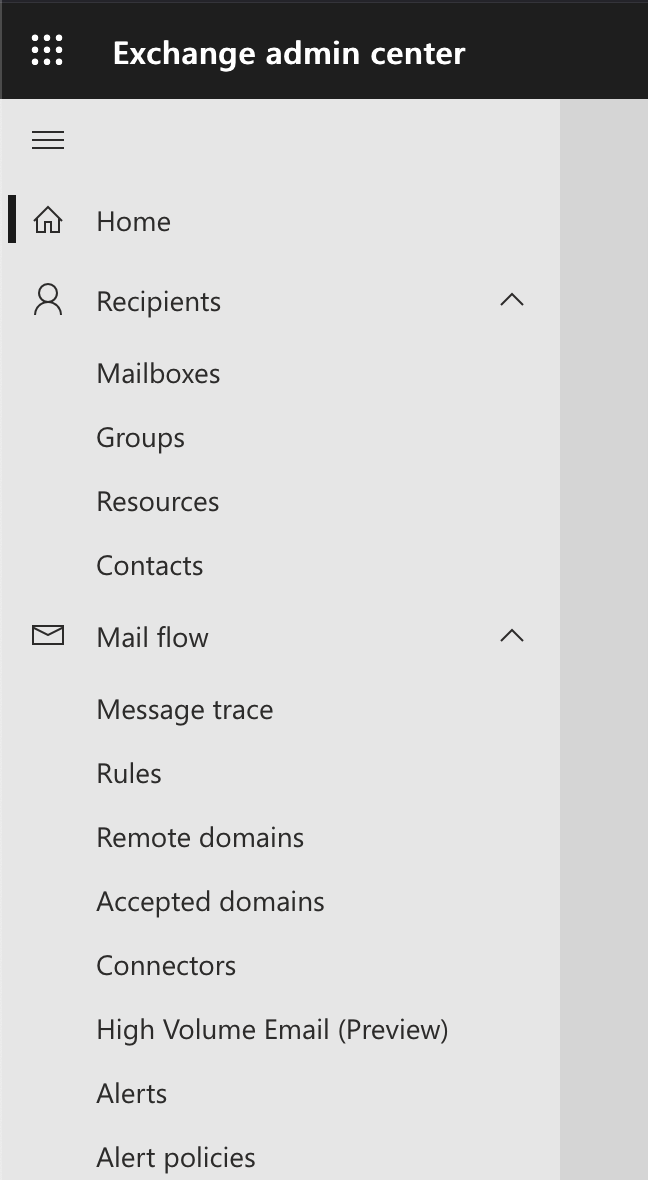
Add a new connector
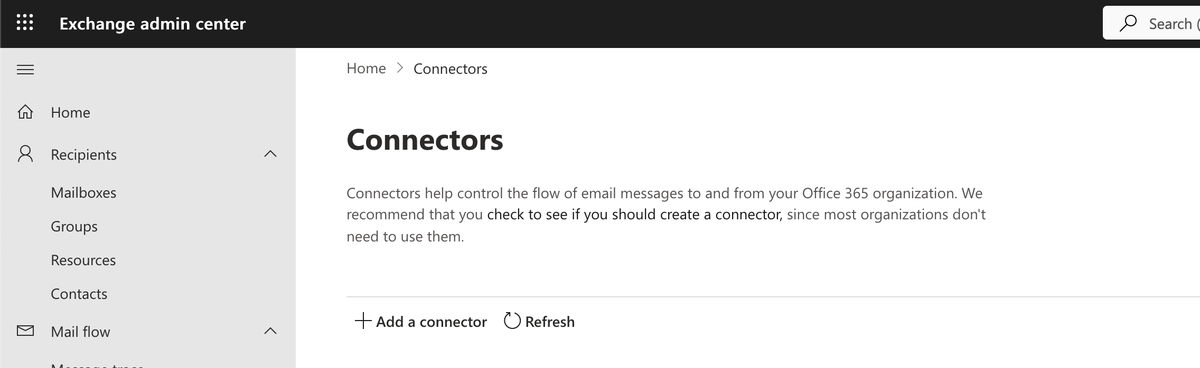
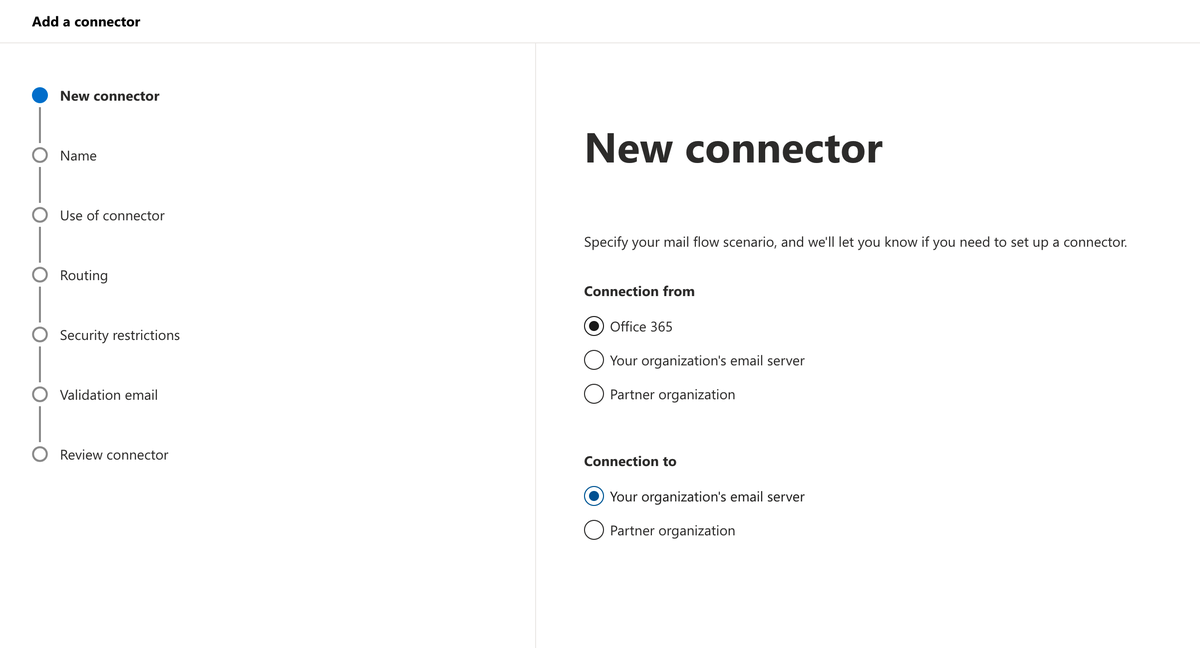
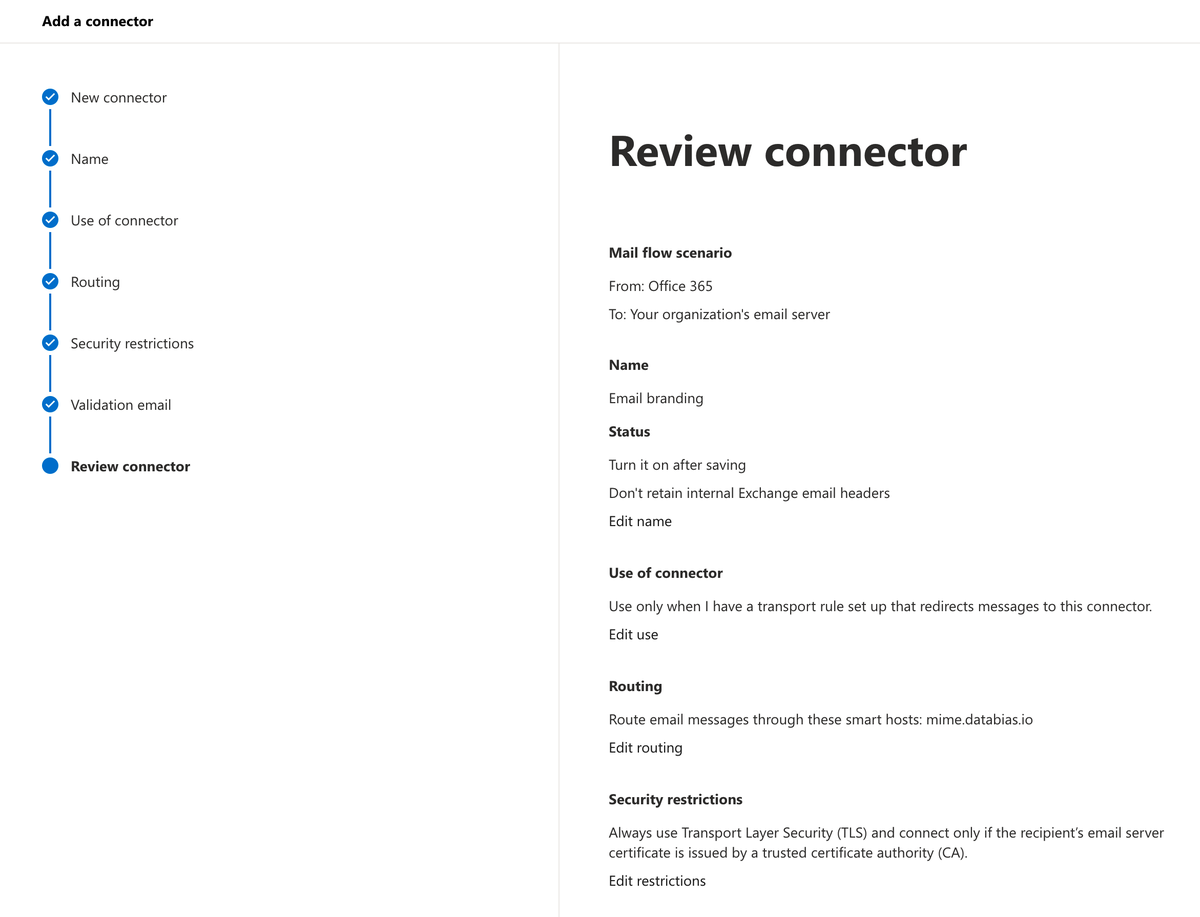
Create a new connector and specify what the connector will do
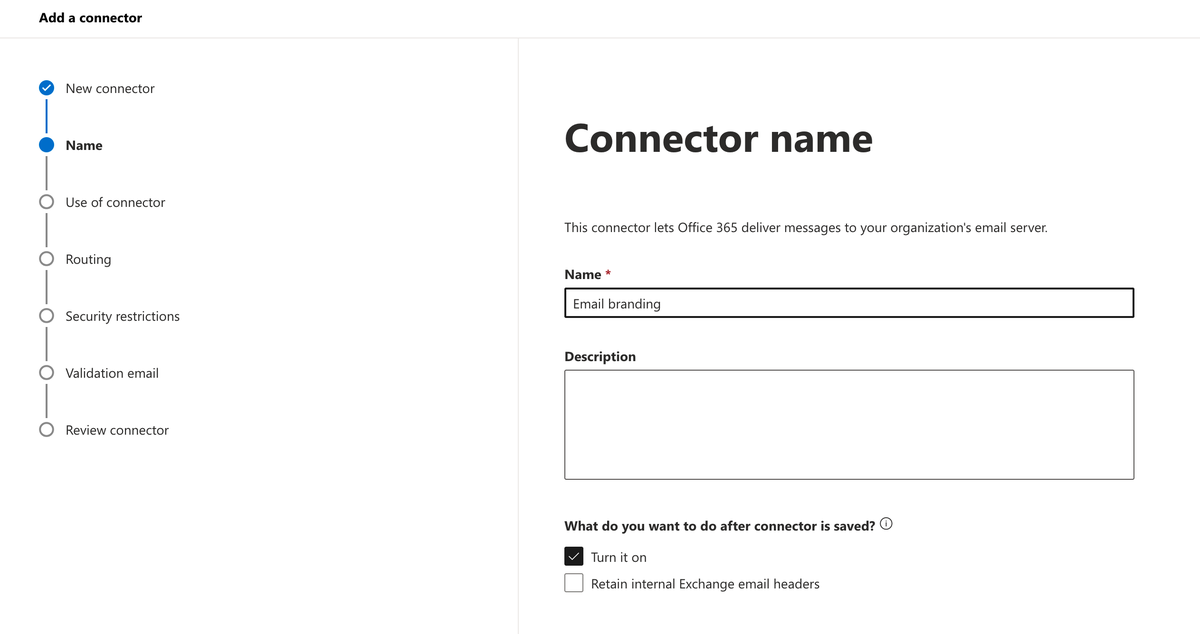
Name your connector: Databias / Email branding
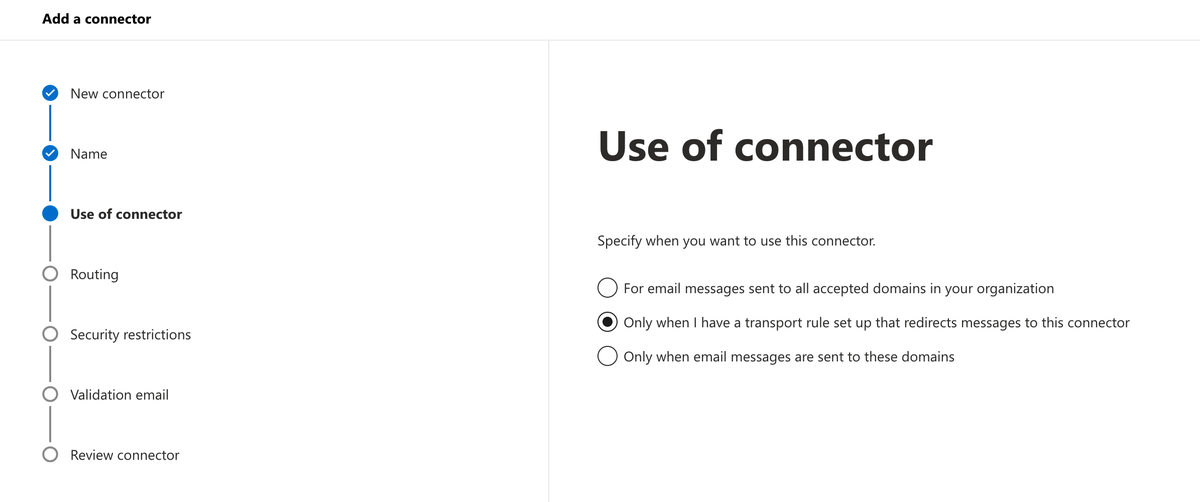
Describe when the connector should be used as per the below.
Select: Only when I have the transport rule set up that redirects messages to the connector.
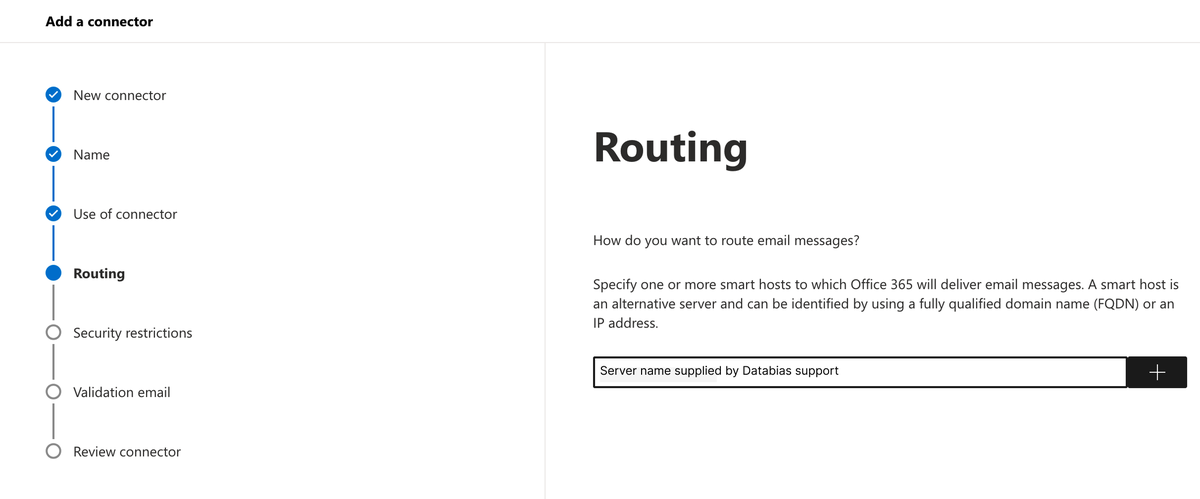
Set the route your mail will flow through
Select: Route email through these smart hosts and click on the + to add the server name supplied by Databias support
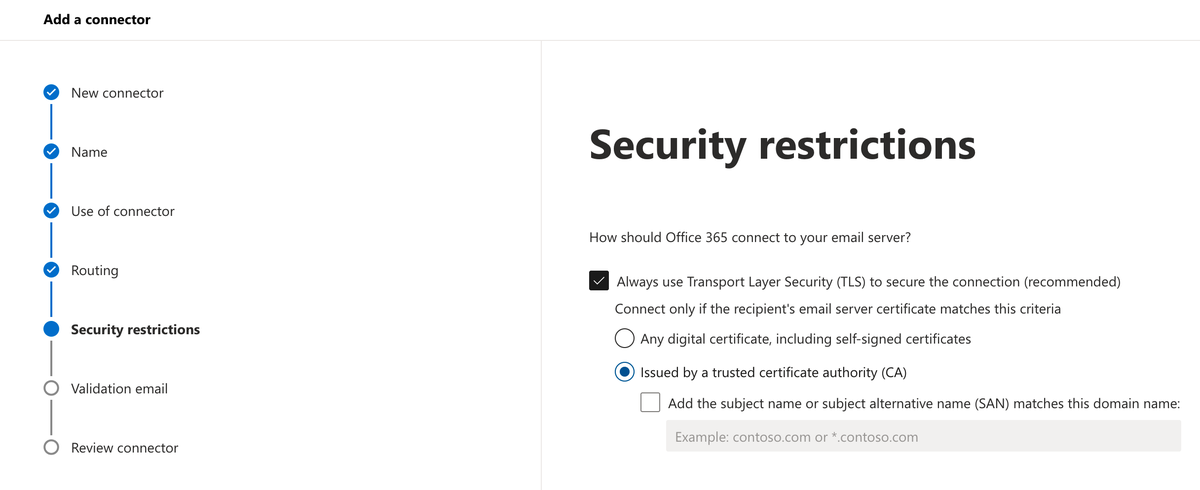
Set security measures
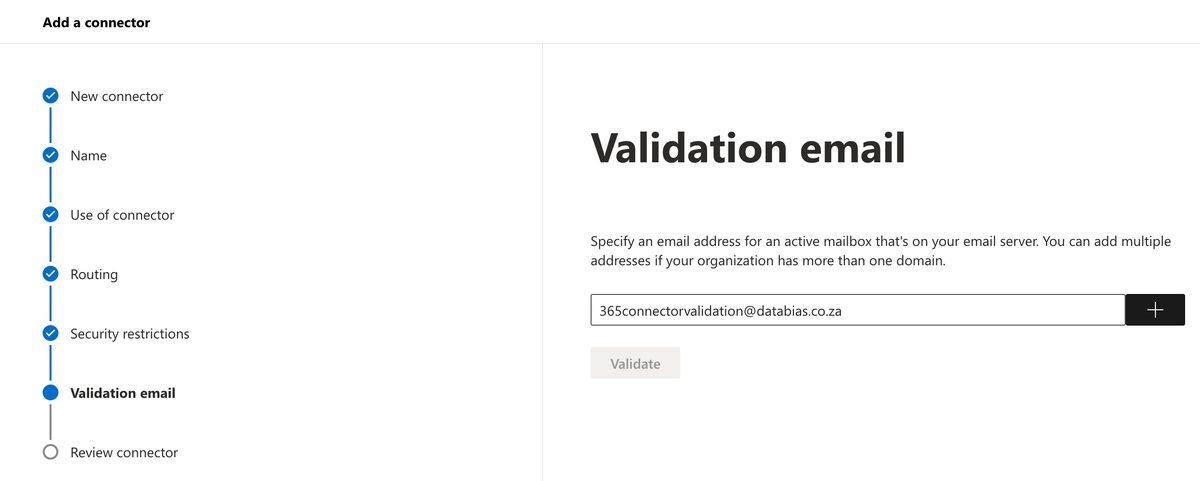
Add a validation email: 365connectorvalidation@databias.co.za
Review your settings and finalise.
ADDING THE RULE
Navigate to the rules section under mail flow
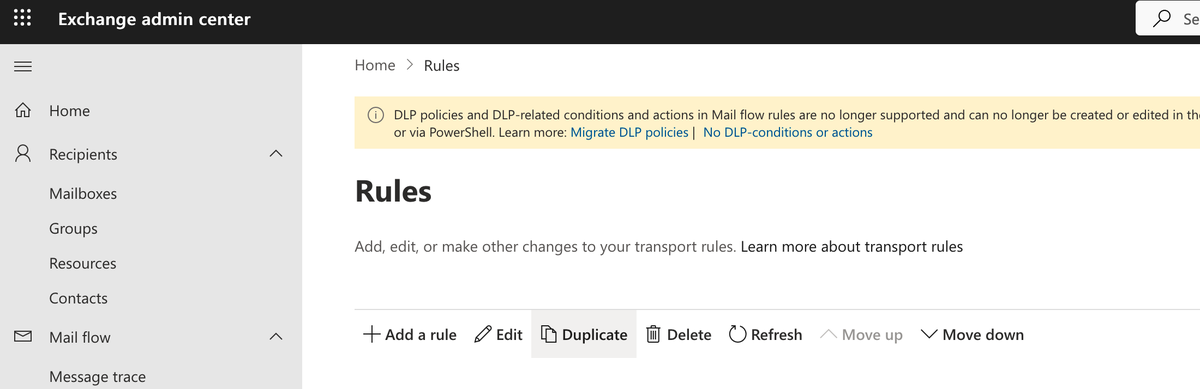
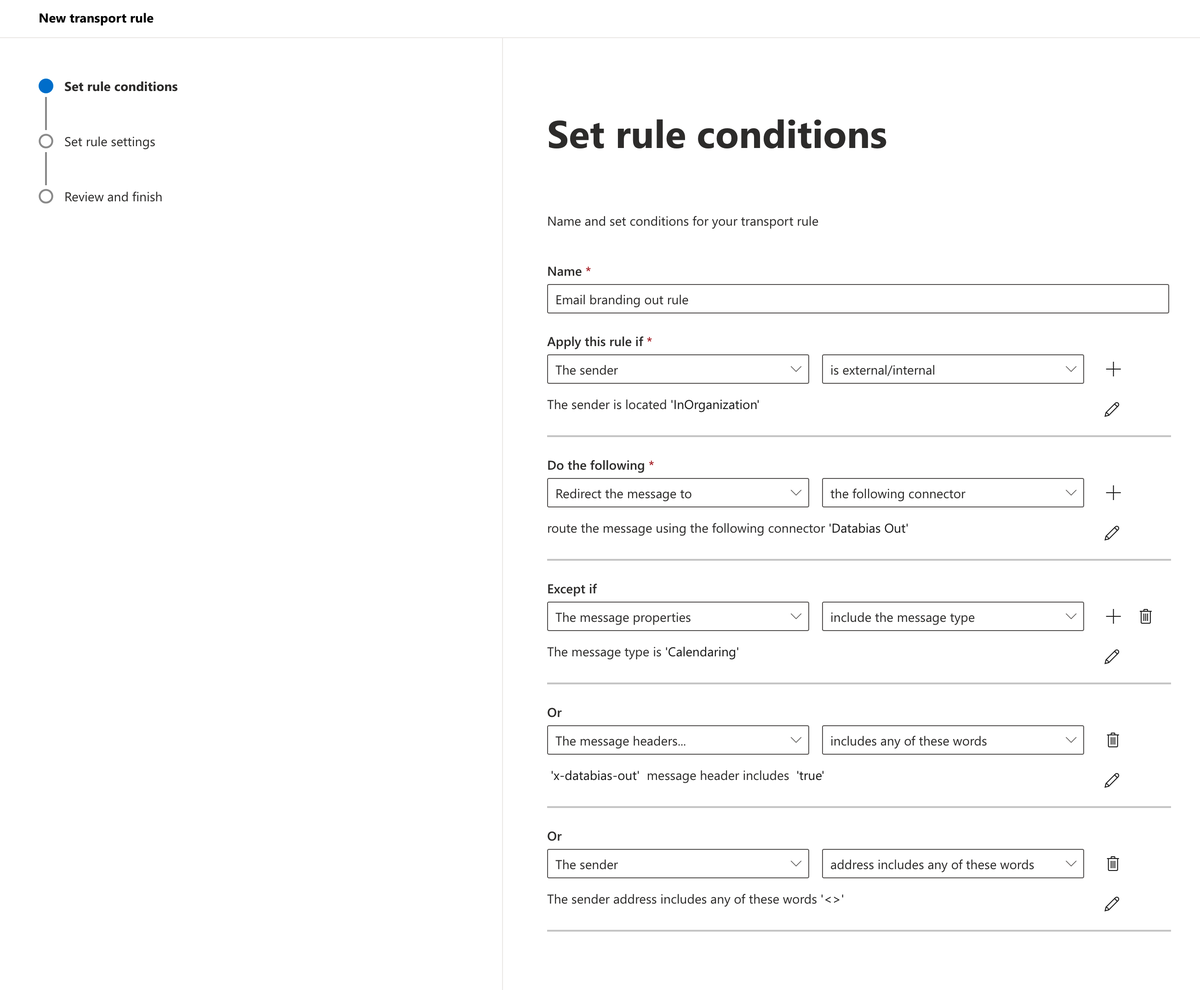
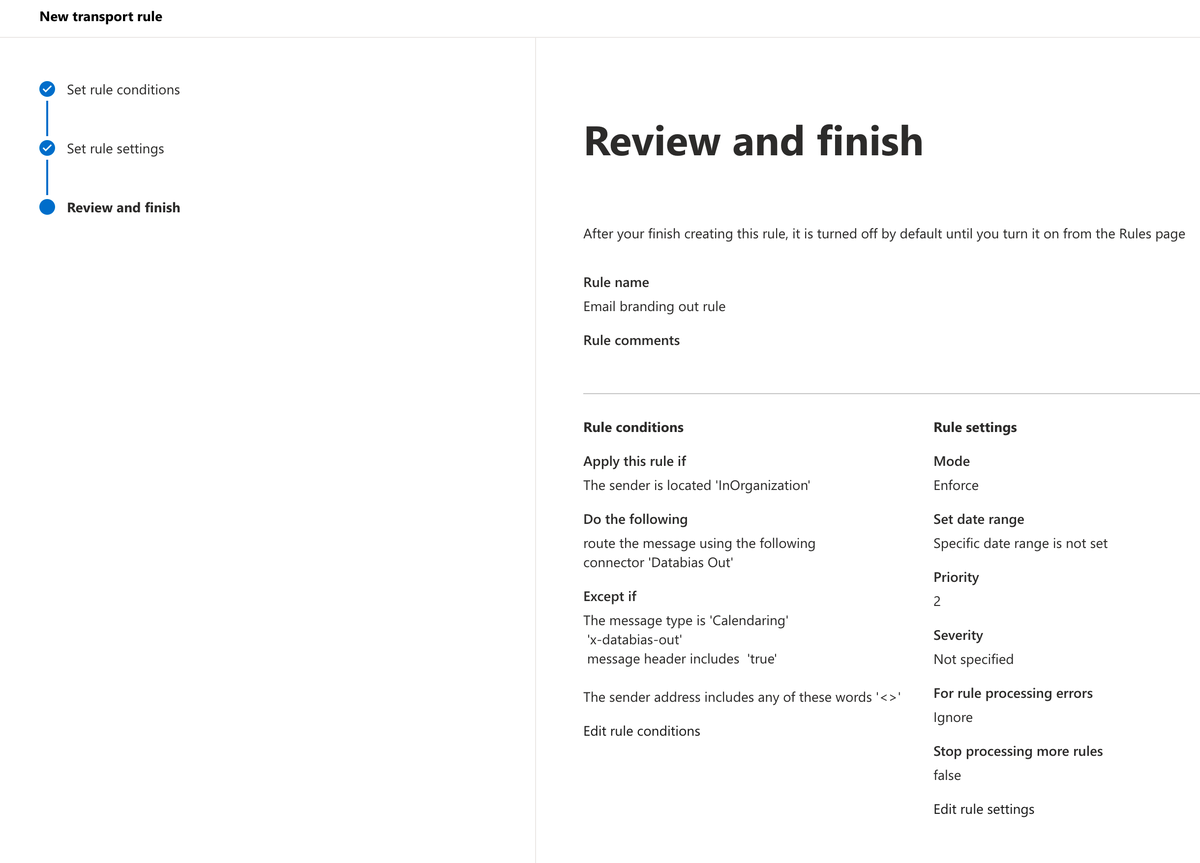
Add the new rule with the following conditions:
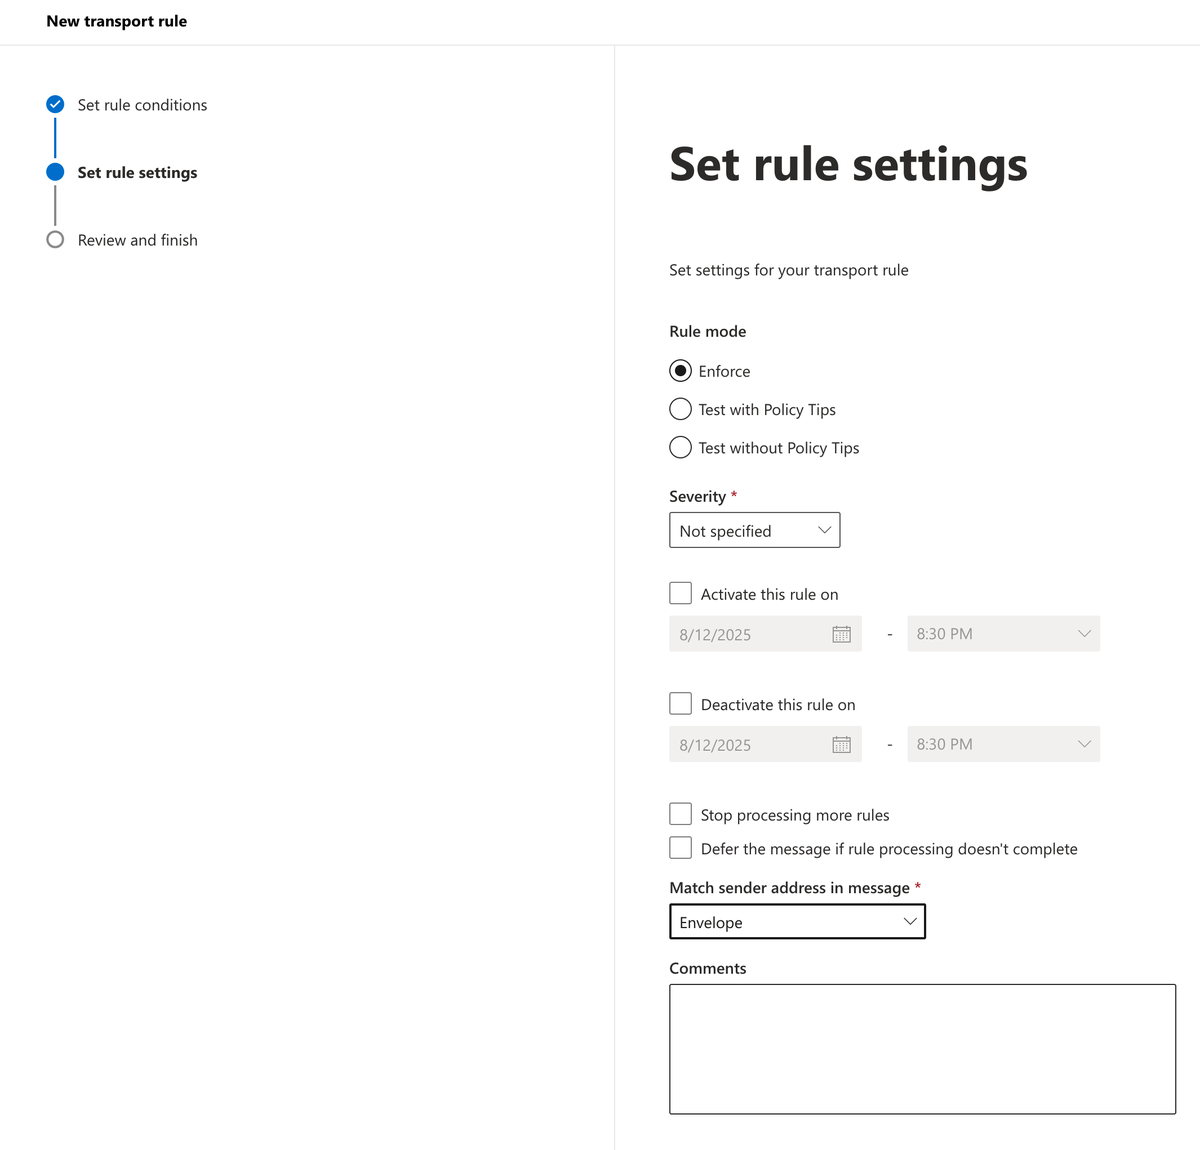
Set the rule settings as per the below and finish.
Review your settings
Send a test email to support@databias.co.za so we can confirm routing success.