Enabling Microsoft Azure Active Directory (AAD) sync for a Databias customer is a reasonably straight-forward task. There are a few per-requisites that you need before you get started:
- Access to your Microsoft Entra admin center as a global administrator
- Access to your Databias customer AAD sync interface
Step 1: Create the AAD app registration and assign read permissions
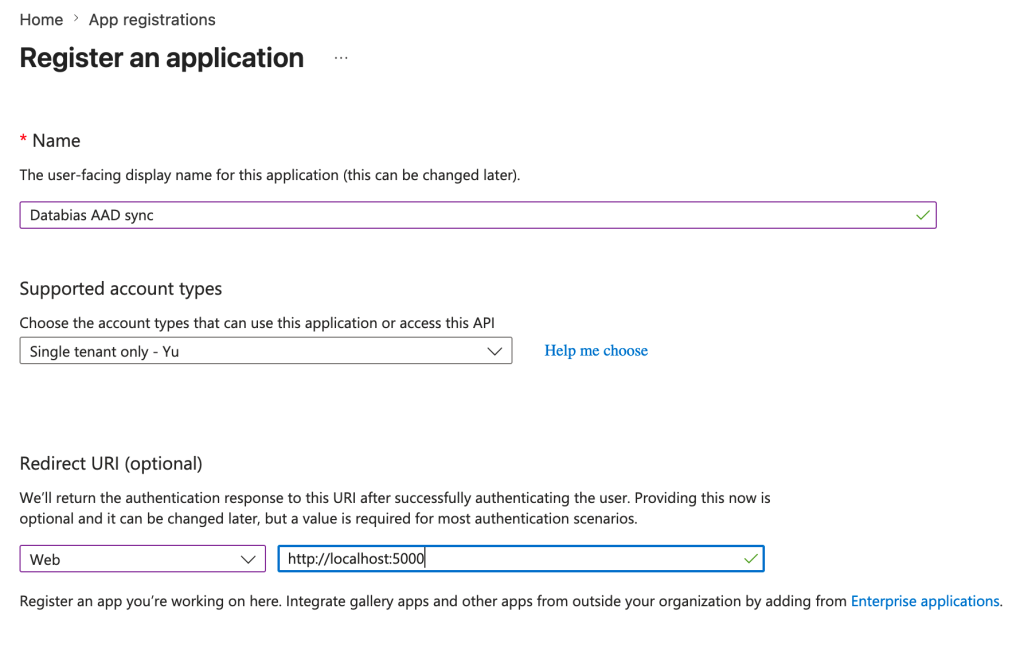
Enter you app name, supported account type and redirect URI as per the image above.
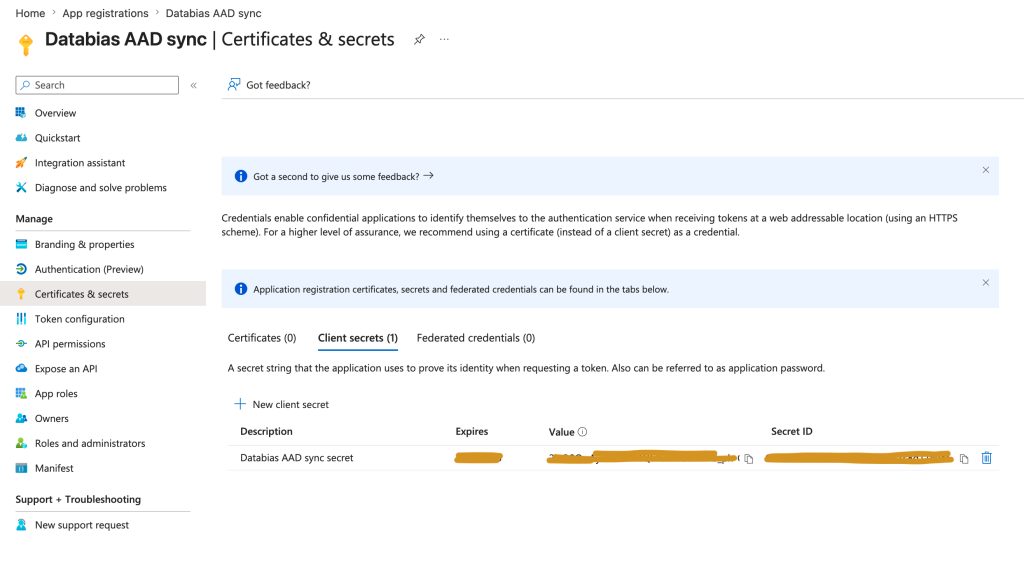
Create a new client secret and take note of the secret value (redacted above).
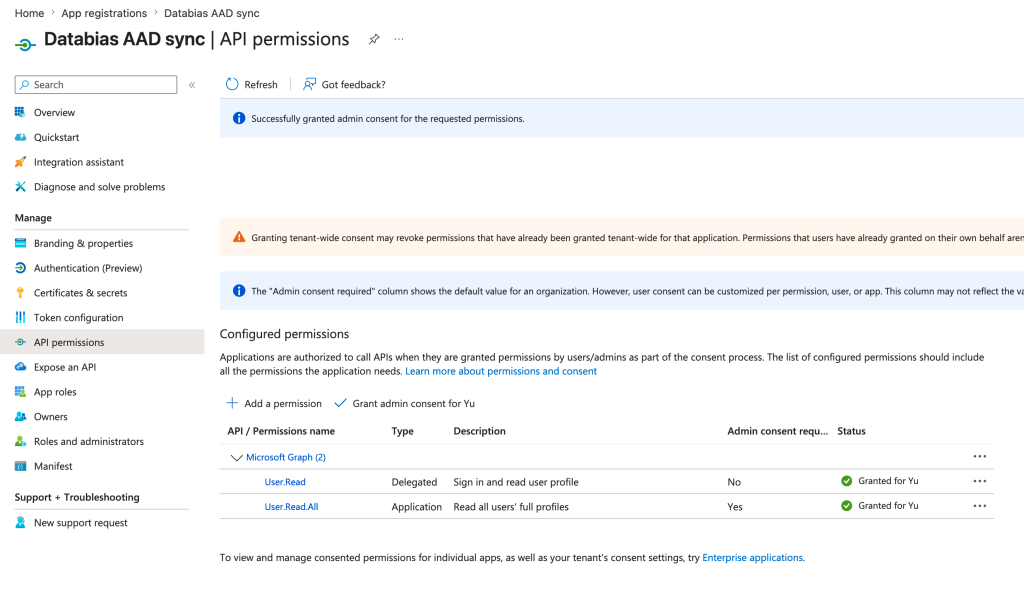
Add the above application permissions. Ensure no write permission are present.
Step 2: Add your AAD app credentials to Databias
Inform Databias support (via a secure channel) of the following details:
- Application (client) ID
- Application secret
- Microsoft domain (ie. yourcompany.onmicrosoft.com)
Once configured your Azure data will sync with your Databias branding and you can centrally manage your senders in Microsoft AAD going forward.