Congratulations, you have signed up for Databias’ email branding and are in the process of getting your email looking slick across all your devices.
Databias’ email branding system works seamlessly across all mail clients and most of the time we simply route your outbound mail through our servers by liaising with your IT guy. However, if you don’t have an IT guy, this article may help with getting set up.
Remember that you only need to brand your outgoing email, so nothing needs to change on your incoming server, all you need to do is route your outbound email through our server, and to do this you need to:
Open Outlook
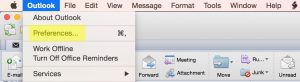
Click on Outlook in the top navigation bar.
Click on Preferences in the drop down that appears.
Click on Accounts in the pop up menu that appears.
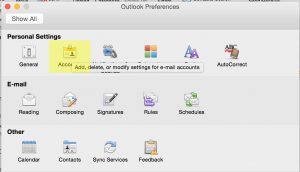
Choose the account you are working with if you have multiple accounts loaded there.
In the pop up window you will see headings like:
Personal information (name and email address)
Server information (this is where we are working) Usually your Incoming server is first and we don’t need to worry about it. Below that information, you will see:
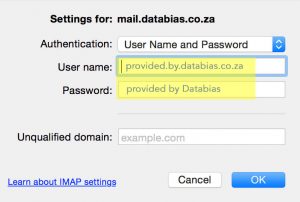
Outgoing server There are a tick boxes here, which you should ignore. What you are looking for is an option that allows you to set a new Outgoing server which you should set to host name provided to you by our support team.
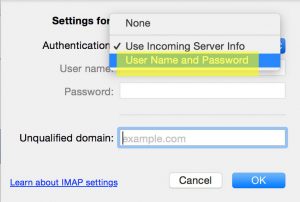
You will have been provided with a user name and password. Usually you will need to click on more options / advanced below the Outgoing server fields to find the place to put these in. And it will be another pop up window with the heading Authentication usually set to: Use incoming server info. This you need to change to: Username and Password and then plug in your new details.
And that is it with Outlook 2011 on Mac. Windows on a PC is slightly different but also very much the same.
Good luck and remember if you do need help, mail us at support@databias.co.za and we will get right back to you.